A successful pet product rarely moves directly from a sketch to a purchase order. Between the original idea and mass production are decisions about the user, materials, structure, safety, tooling, testing, branding, packaging, cost, and quality control.
Skipping these decisions does not make them disappear. It usually moves them to a later stage, when changes take more time and cost more money.
This guide explains the complete pet product development process for brands, retailers, importers, and e-commerce sellers working with an OEM/ODM manufacturer.

Stage 1: Define the Product Opportunity
Begin with the problem the product should solve.
Examples:
- A slow feeder that is easier to clean
- A chew toy with a distinctive play pattern
- A travel bowl that packs more efficiently
- A grooming tool that is more comfortable to hold
- A smart product that simplifies a daily pet-care task
Define the target customer and target pet:
- Dog, cat, or another pet
- Size and age
- Behavior or use scenario
- Sales market and channel
- Target retail price
- Competitive position
A specific brief—“a freezer-safe treat-dispensing toy for medium dogs sold through premium pet stores”—is more actionable than “a new dog toy.”
Stage 2: Create a Product Brief
The product brief aligns the buyer, designer, engineer, sourcing team, and manufacturer.
Include:
- Product purpose and key benefit
- Target pet and user
- Reference products or inspiration
- Required and optional features
- Preferred size and weight
- Material preferences or restrictions
- Target colors
- Logo and packaging needs
- Target market
- Expected order quantity
- Target cost
- Desired launch date
- Testing and compliance expectations
- Intellectual-property considerations
Rank requirements as “must have,” “preferred,” and “optional.” This makes trade-offs easier when cost, tooling, timing, or manufacturability conflicts arise.
Stage 3: Feasibility Review
The manufacturer reviews whether the concept can be produced safely, consistently, and within the commercial target.
The review may cover:
- Suitable manufacturing process
- Material options
- Expected tooling
- Wall thickness and geometry
- Assembly method
- Number of components
- Decoration and logo options
- Packaging approach
- Estimated unit cost
- Minimum order quantity
- Development and production timeline
- Main technical risks
This stage is where early design-for-manufacturing decisions create the most value. Adjusting an undercut, seam, opening, texture, or assembly method before tooling is much easier than changing it after the mold is complete.
HEOU’s new pet product development service supports the path from concept and design through sampling and production.
As a China-based professional pet product manufacturer, HEOU supports OEM and ODM projects across pet toys, feeding products, cleaning products, travel products, and smart pet supplies.
Have a pet product idea you want to manufacture? Contact HEOU with your concept, target market, expected quantity, budget range, and desired launch date to start a feasibility review.
Stage 4: Concept Design
Designers turn the brief into visual directions and product architecture.
Depending on the product, outputs may include:
- Hand sketches
- 2D renderings
- Color and material directions
- Feature layouts
- Exploded views
- Preliminary dimensions
- User interaction sequences
Review the concept against the original problem. Attractive styling is important, but the design should also be understandable, cleanable, suitable for the pet, and realistic to manufacture.
Avoid selecting a concept only from a front-view rendering. Consider all sides, connection points, openings, internal parts, packaging orientation, and how the product changes during use.
Stage 5: Engineering and Detailed Specification
Once the direction is selected, the design is translated into production information.
This may include:
- 3D CAD files
- Engineering drawings
- Dimensions and tolerances
- Material grades
- Hardness or density targets
- Surface textures
- Color references
- Component bill of materials
- Assembly requirements
- Logo artwork and location
- Critical-to-quality characteristics
- Test criteria
For molded products, engineers review draft, parting lines, gates, ejection, wall thickness, shrinkage, and mold structure. For sewn products, the team reviews patterns, seam allowance, stitch type, reinforcement, filling, and attachment methods.
The specification should have a revision number. When the design changes, the files, quotation, sample, and test plan should all point to the same revision.
Stage 6: Costing and Commercial Alignment
Product cost is shaped by more than raw material.
The quotation may include:
- Tooling or mold cost
- Unit manufacturing cost
- Logo and decoration
- Packaging
- Testing
- Accessories and inserts
- Inner and master cartons
- Setup charges
- Freight assumptions
Review the quotation together with the specification. A lower price is not a valid saving if it is based on a different material, smaller size, lighter weight, simpler packaging, or reduced test scope.
At this stage, confirm payment terms, MOQ, sample charges, ownership or use of tooling, lead-time assumptions, and the process for engineering changes.
Stage 7: Prototype Development
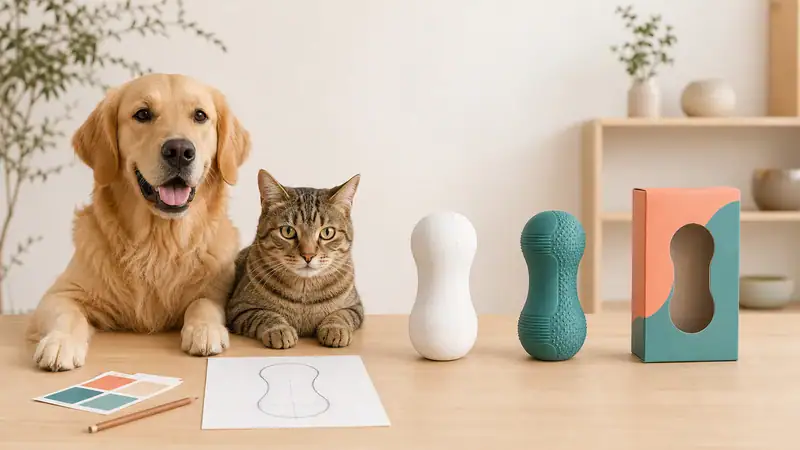
Prototypes help answer specific questions before full production tooling or final approval.
Possible methods include:
- 3D printing
- CNC machining
- Hand-built textile samples
- Soft tooling
- Existing mold samples using similar materials
- Appearance mockups
- Functional breadboards for smart products
A prototype may not perfectly represent final color, texture, strength, weight, or molding behavior. Document what it is intended to validate: size, ergonomics, assembly, function, appearance, or packaging fit.
Stage 8: Tooling and Tool Trials
For custom molded components, approved engineering files are used to create the tooling. The first tool trials reveal how the design and material behave in the real process.
Review trial samples for:
- Dimensions
- Part weight
- Material flow
- Flash
- Sink marks
- Voids or bubbles
- Warpage
- Weld lines
- Texture
- Ejection marks
- Fit with other parts
- Logo definition
Corrections may involve process adjustments, tool polishing, steel modification, gate changes, or design updates. Record each trial and revision rather than relying on informal messages.
Stage 9: Functional, Durability, and Material Testing
Testing should be planned early, not added after packaging is printed.
The test plan may include:
- Material identification and chemical requirements
- Pull, torque, compression, or static loading
- Repeated-use cycling
- Drop and impact
- Abrasion
- Leak or flow performance
- Cleaning and wash testing
- Temperature and moisture conditioning
- Squeaker, rope, seam, or attachment tests
- Electrical, battery, charging, or software checks for smart products
- Packaging and transport testing
The exact plan depends on the product, intended use, target market, retailer, and risk assessment. Qualified laboratories and compliance professionals should confirm the applicable requirements.
If a test fails, investigate the cause and verify the corrective change with a new representative sample.
Stage 10: Branding and Packaging Development
Product branding and packaging should develop alongside the product, not after it.
Finalize:
- Logo method, dimensions, and position
- Product and color names
- Packaging structure
- Dieline
- Artwork
- Instructions
- Warnings
- Barcodes and SKU data
- Country-of-origin and responsible-party information
- Retailer or marketplace labels
- Inner pack and master carton
Test the real product in the real packaging. Confirm shelf or peg performance, parcel protection, barcode scanning, carton utilization, and packing efficiency.
Stage 11: Pre-Production Sample Approval
The pre-production sample should represent the intended mass-produced item as closely as possible.
Review:
- Final material and color
- Dimensions and weight
- Appearance and workmanship
- Function
- Durability
- Logo
- Accessories
- Instructions and warnings
- Retail packaging
- Carton packing
Document every open point. Once corrected, sign and date a golden sample and the final product specification. Do not rely on a sample that no longer matches the latest approved files.
Stage 12: Pilot Production
A pilot run or controlled first production batch checks whether the factory process can repeat the approved product at scale.
It can reveal:
- Variation between mold cavities
- Differences between operators or lines
- Assembly bottlenecks
- Material handling issues
- Logo registration variation
- Packaging inefficiency
- Unexpected defect patterns
- Inspection points that need improvement
Use pilot results to finalize work instructions, fixtures, inspection frequency, defect limits, and production capacity assumptions.
Stage 13: Mass Production and Quality Control
Quality control should be built into production.
A typical control plan may include:
- Incoming material and component inspection
- First-article approval
- In-process checks
- Critical dimension and function tests
- Logo and appearance inspection
- Assembly verification
- Packaging and barcode checks
- Final random inspection
- Lot and traceability records
The approved specification, golden sample, defect guide, and inspection checklist should be available to the production and QC teams.
When a nonconformity appears, contain the affected product, investigate the cause, implement corrective action, and verify the result before continuing.
Stage 14: Shipment and Post-Launch Feedback
Before shipment, confirm:
- Final inspection status
- Quantity
- Carton marks
- Shipping documents
- Product and packaging revision
- Loading method
- Destination requirements
Development continues after launch. Monitor:
- Customer reviews
- Returns and complaints
- Product wear patterns
- Packaging damage
- Assembly or instruction questions
- Retailer feedback
- Reorder performance
Feed this information into the next production run. Small improvements to instructions, packaging, material, geometry, or QC can significantly improve the product over time.